「Hexo」Hexo 开启阅读计数功能
简述:本文简练描述 Hexo 博客如何开启自带的阅读计数功能。
1 leancloud配置
1.1 第一步
先注册。
1.2 第二步
创建应用,名字随意,计价方案为开发版。
1.3 第三步
创建Class,名字必须为Counter,默认ACL权限设置为无限制。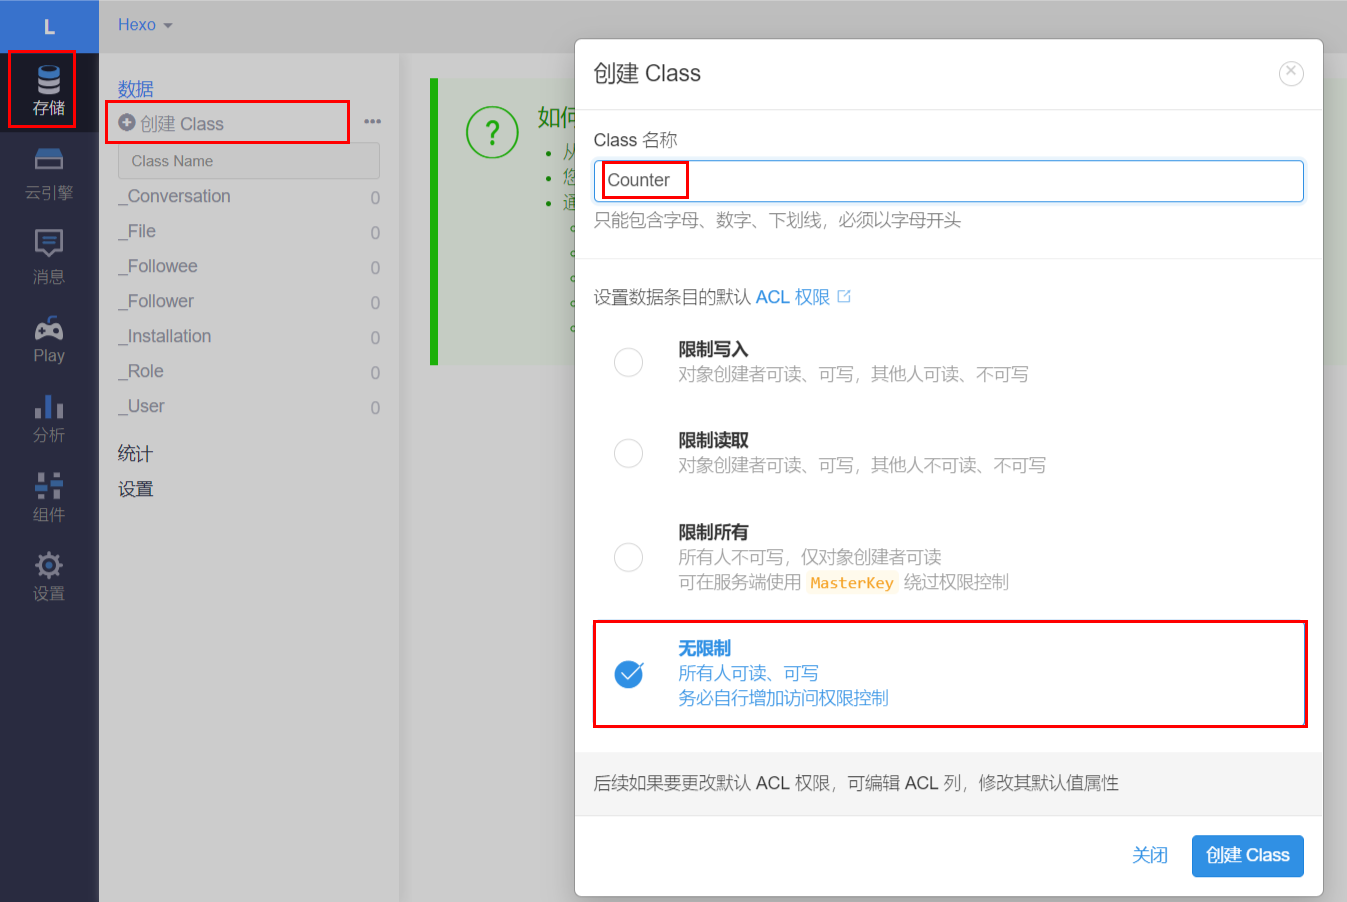
1.4 第四步
在设置中获取appid和appkey,之后跳到**NexT配置**。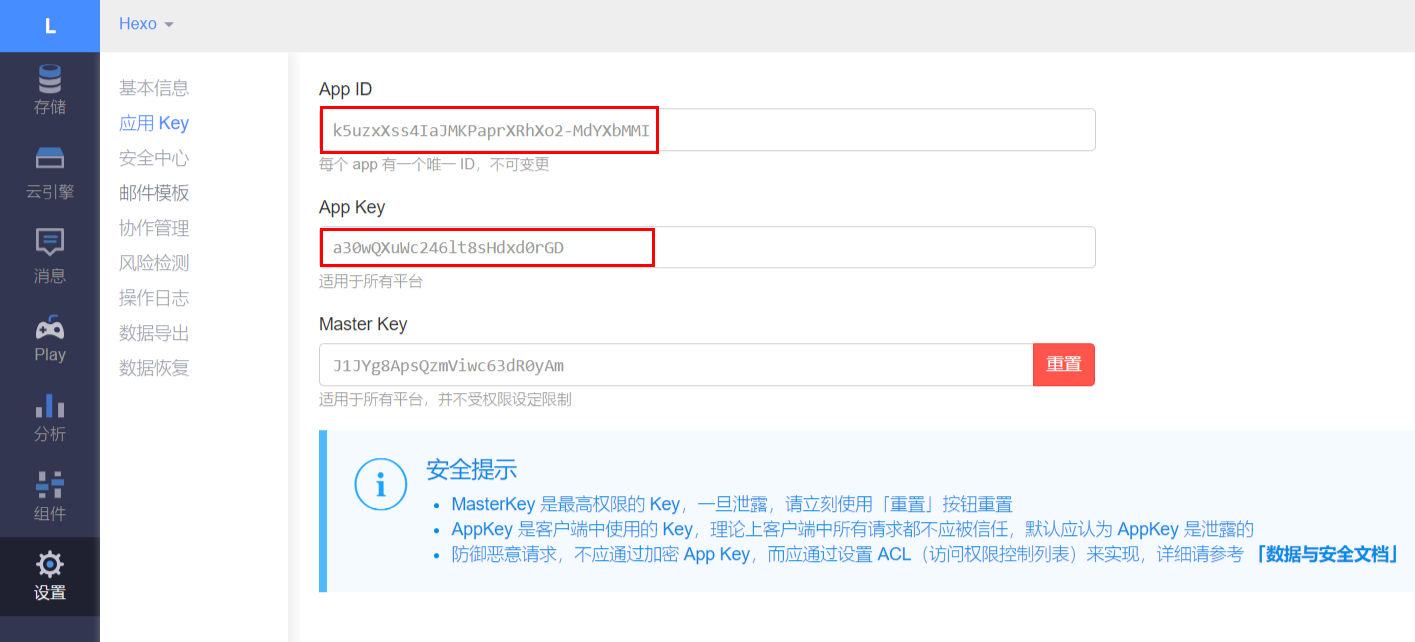
2 NexT配置
打开NexT主题目录下的_config.yml,找到leancloud_visitors位置,并如下修改之。
1 | # Show number of visitors to each article. |
3 设置web安全域名(非必须)
在设置->安全中心中,web安全域名处填写博客域名。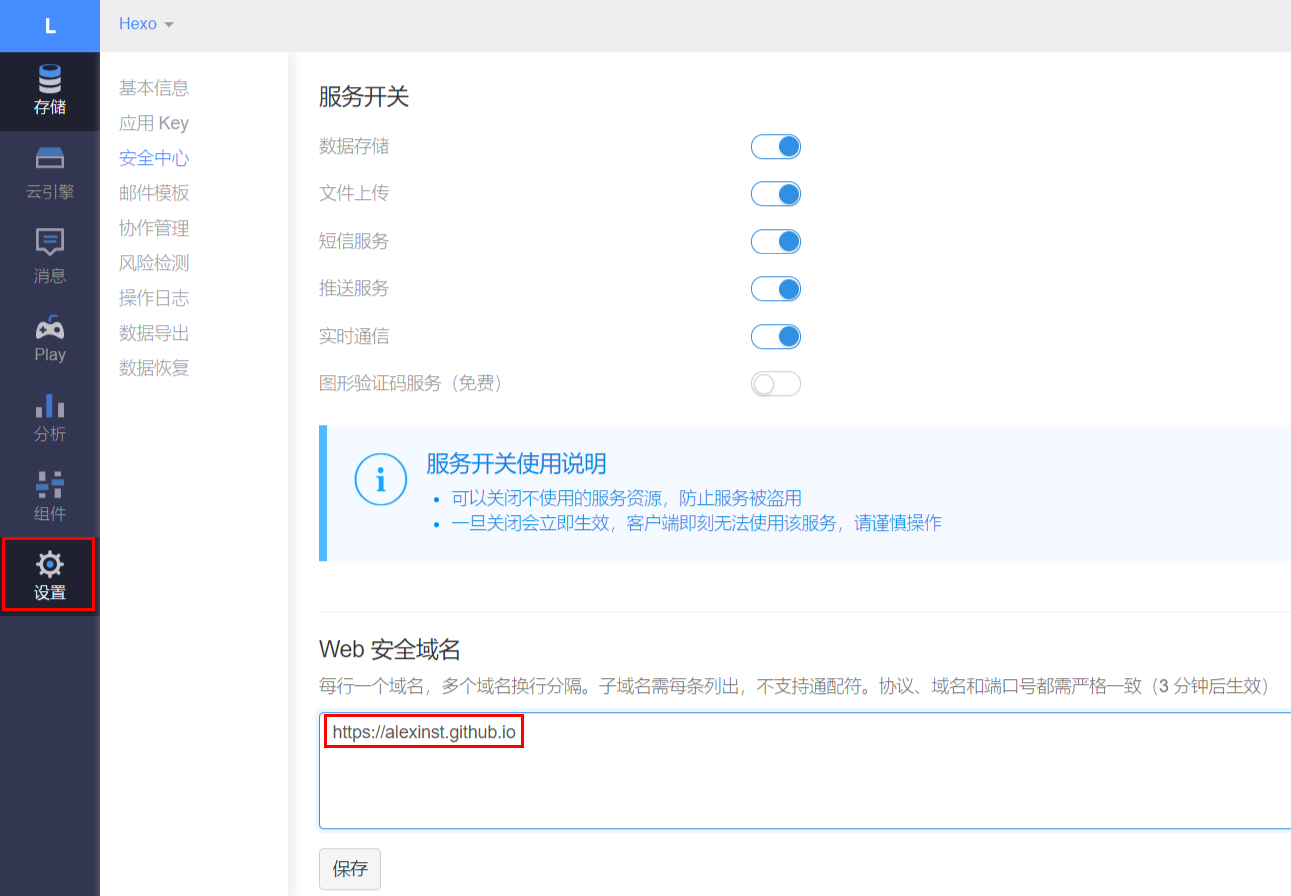
如果打开浏览器调试模式(F12),出现403错误,则意味着域名填写出错。
那就只有两个办法:
- 死磕
- 放弃设置web安全域名
我选择第二个办法,毕竟第一个办法失败了,毕竟只是个小破站。所以,在NexT主题的_config.yml中将leancloud_visitors的security设置为false。
以上!
「Hexo」Hexo 开启阅读计数功能
https://alexinst.github.io/Manual/counting-function-of-hexo/